Hosting Ghost on Linode
Learn how to host your Ghost publishing platform on Linode.

The purpose of this document is to detail how to spin up a Linode instance running Ubuntu 16.04 LTS, and run the Ghost publishing platform on this instance. We'll assume you already have created an set up a Lindode account.
Configuring the Lindode Instance
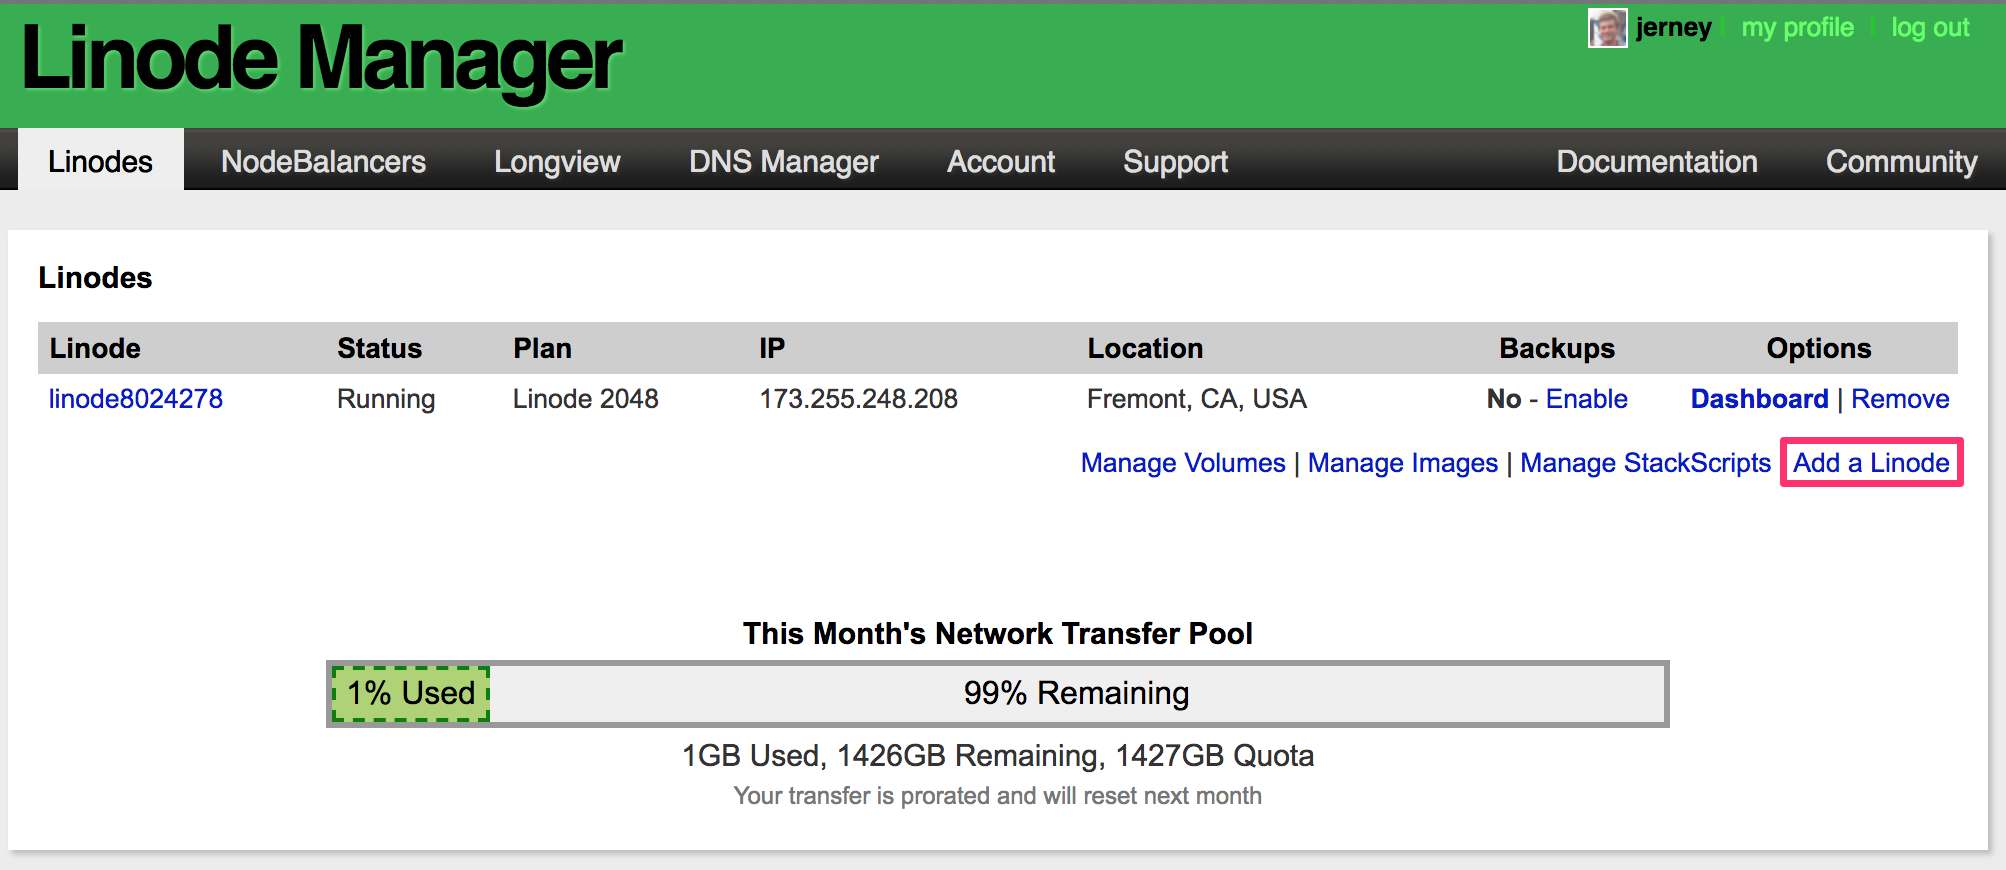
Log into your Linode account. Your landing page will be one of two pages, depending on if you already have a Linode configured. If you do have a Linode configured already, you will see the following screen, click the "Add a Linode" link.
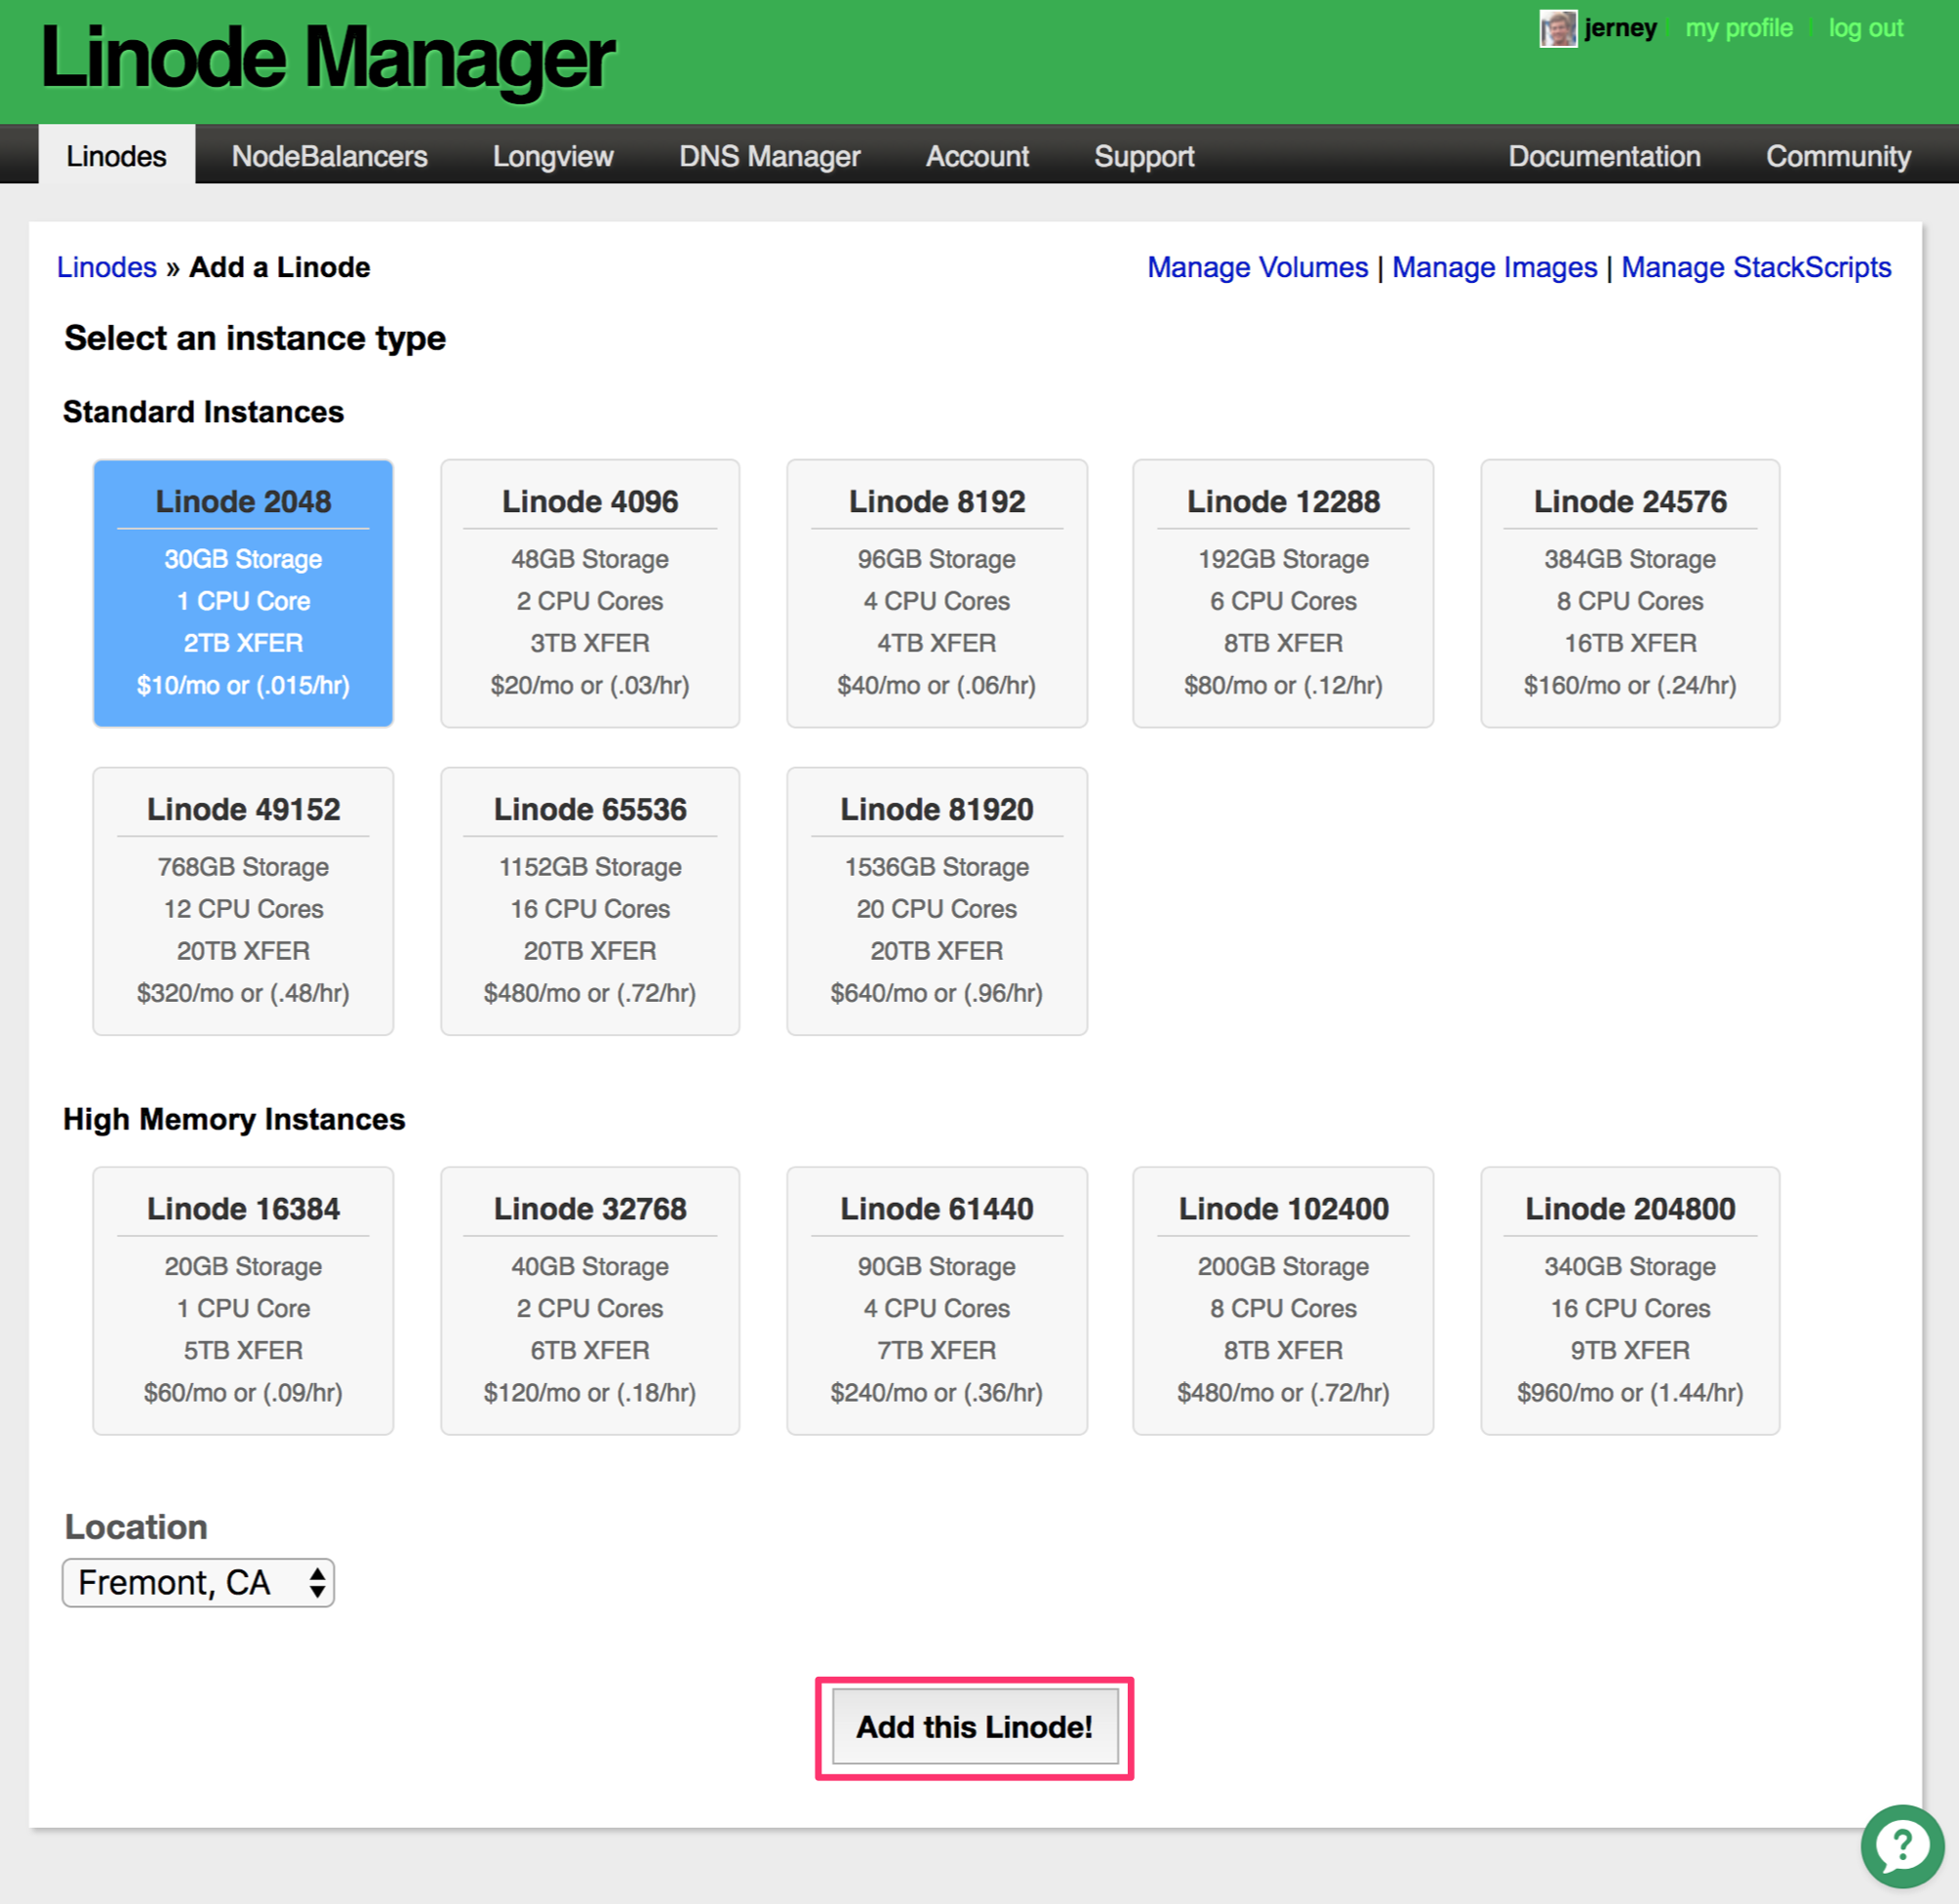
If you hadn't previously configured a Linode, you will have seen this page. Select the smallest instance, the Linode 2048 and click the "Add this Linode!" button.
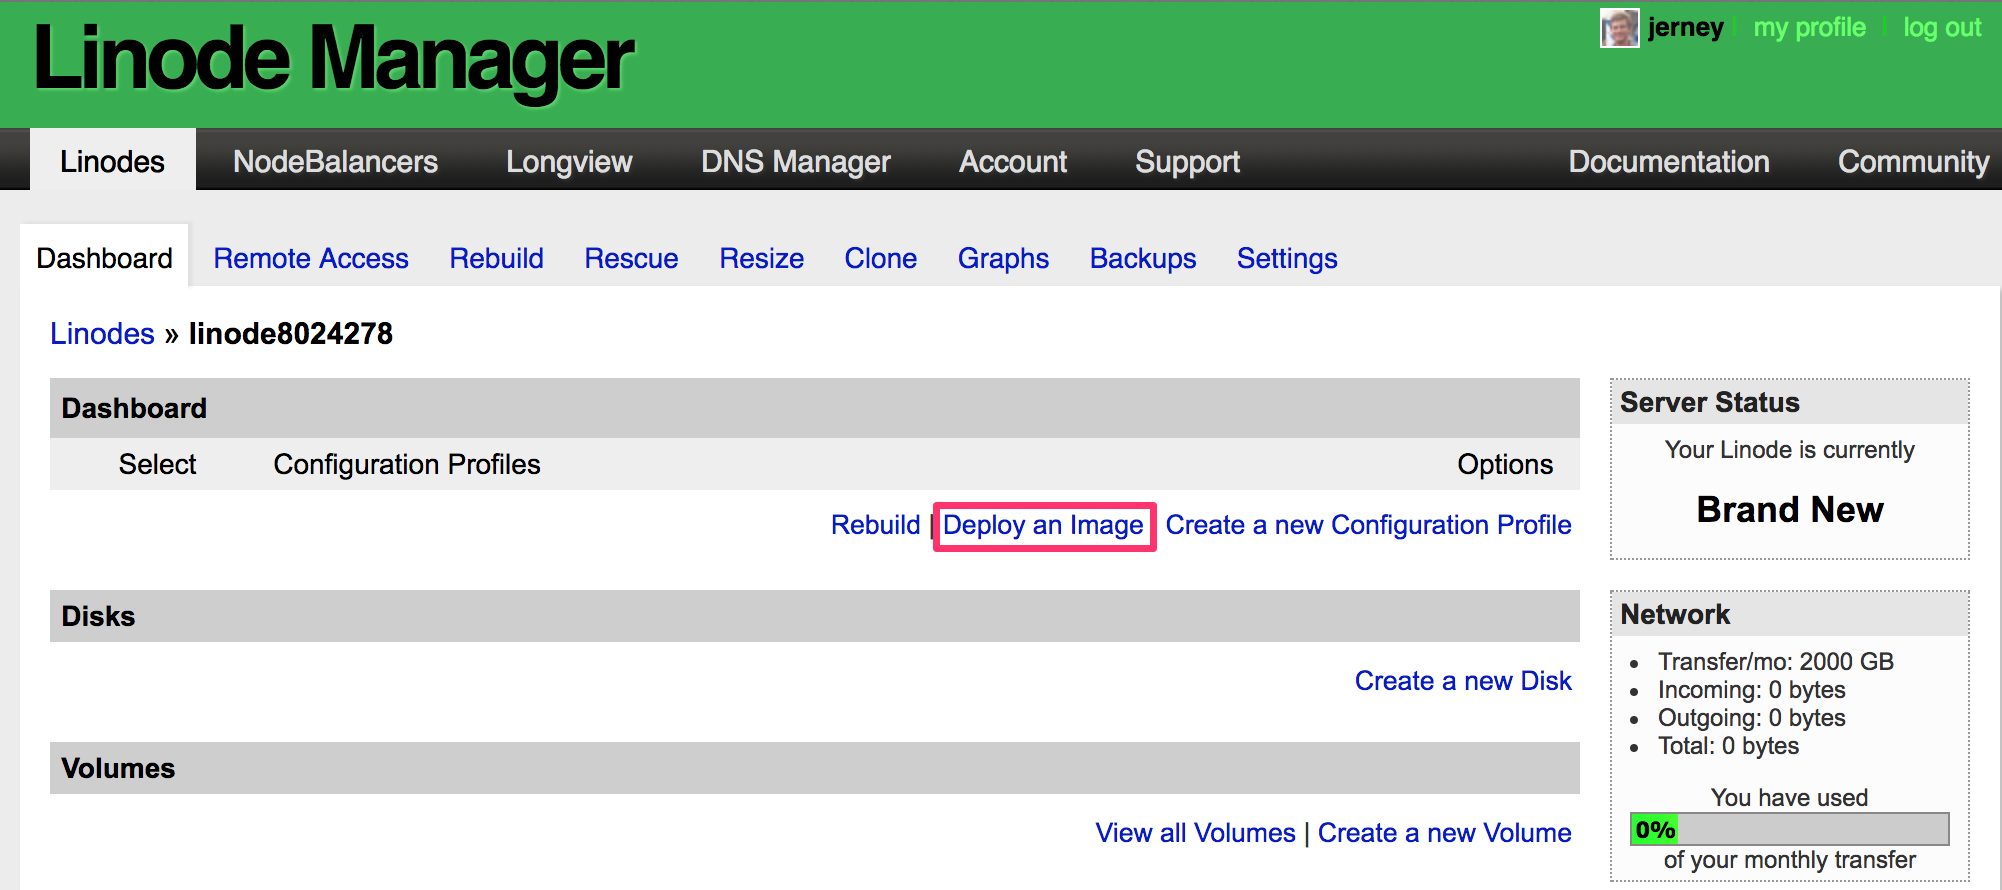
This will bring you to a page that displays your Linodes. You should see your Linode being created. After a few seconds, if you refresh the page, you should see that it's status is now Brand New*. Click on the name of this Linode to check out its details.

Click on the "Deploy an Image" link.
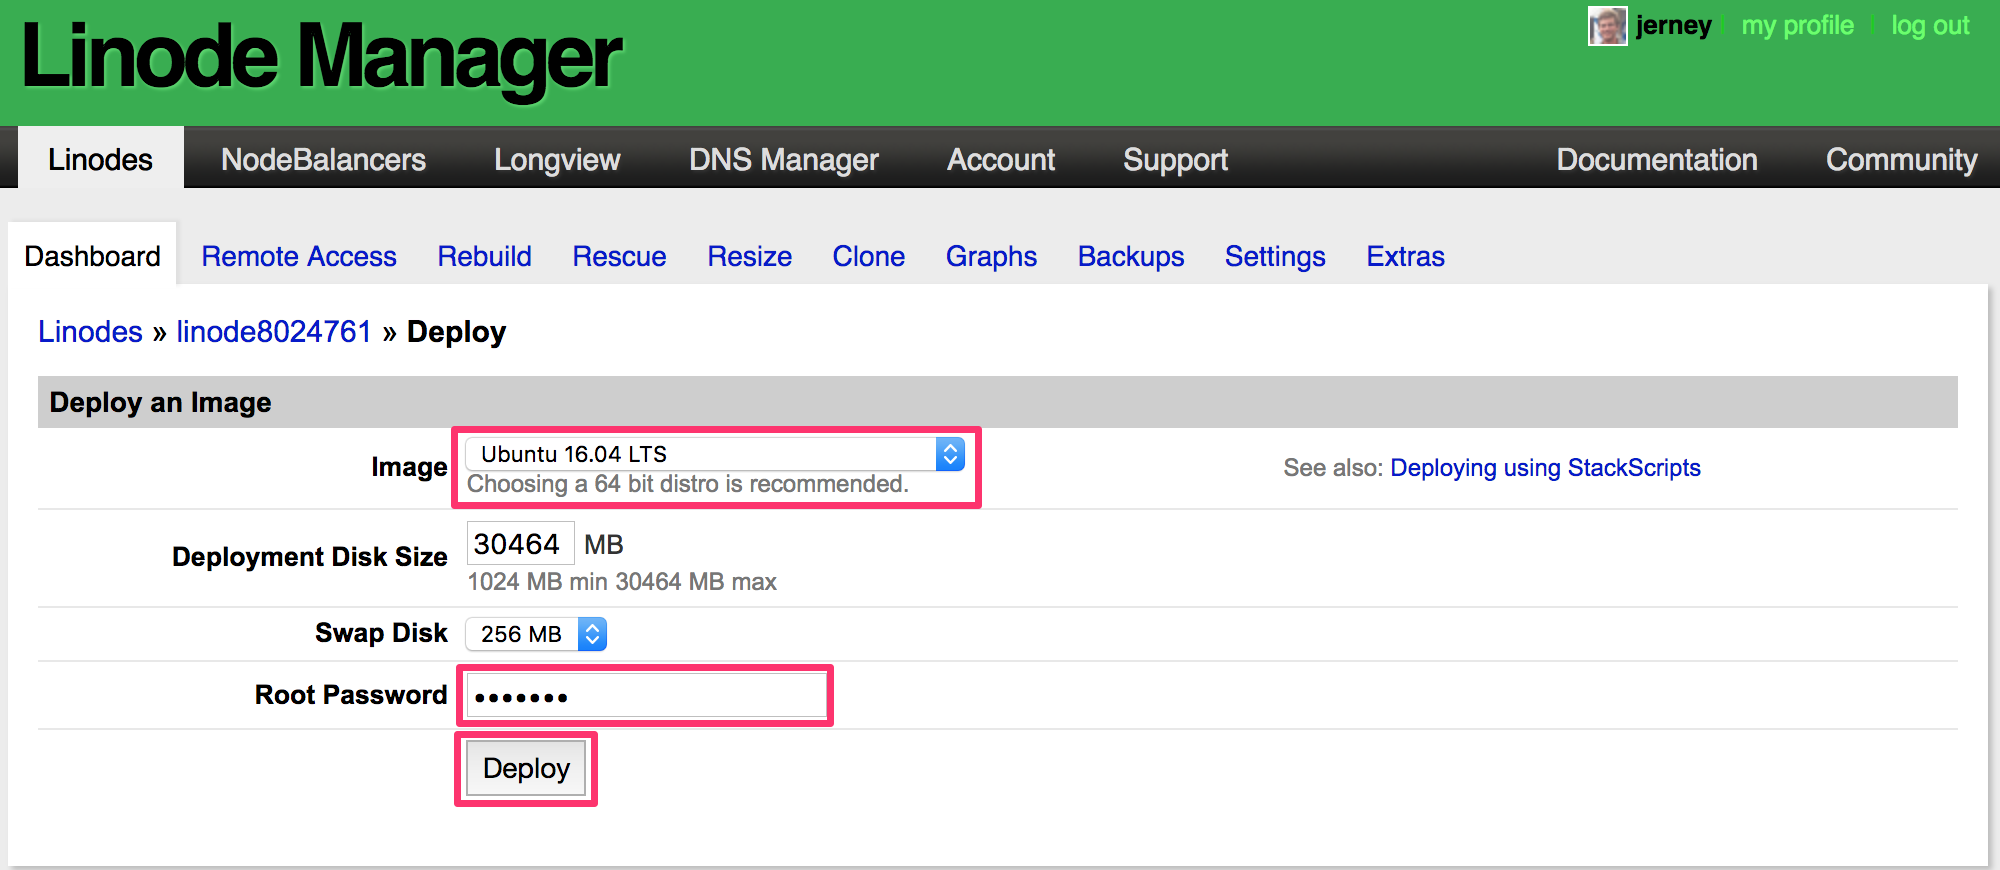
Next, select what image you would like to deploy. Select the Ubuntu 16.04 LTS image, set the root password, and click the "Deploy" button.
When the next page loads, you'll see some processes running down in the "Host Jobs Queue" section. Wait for them to finish, then click the "Boot" button.
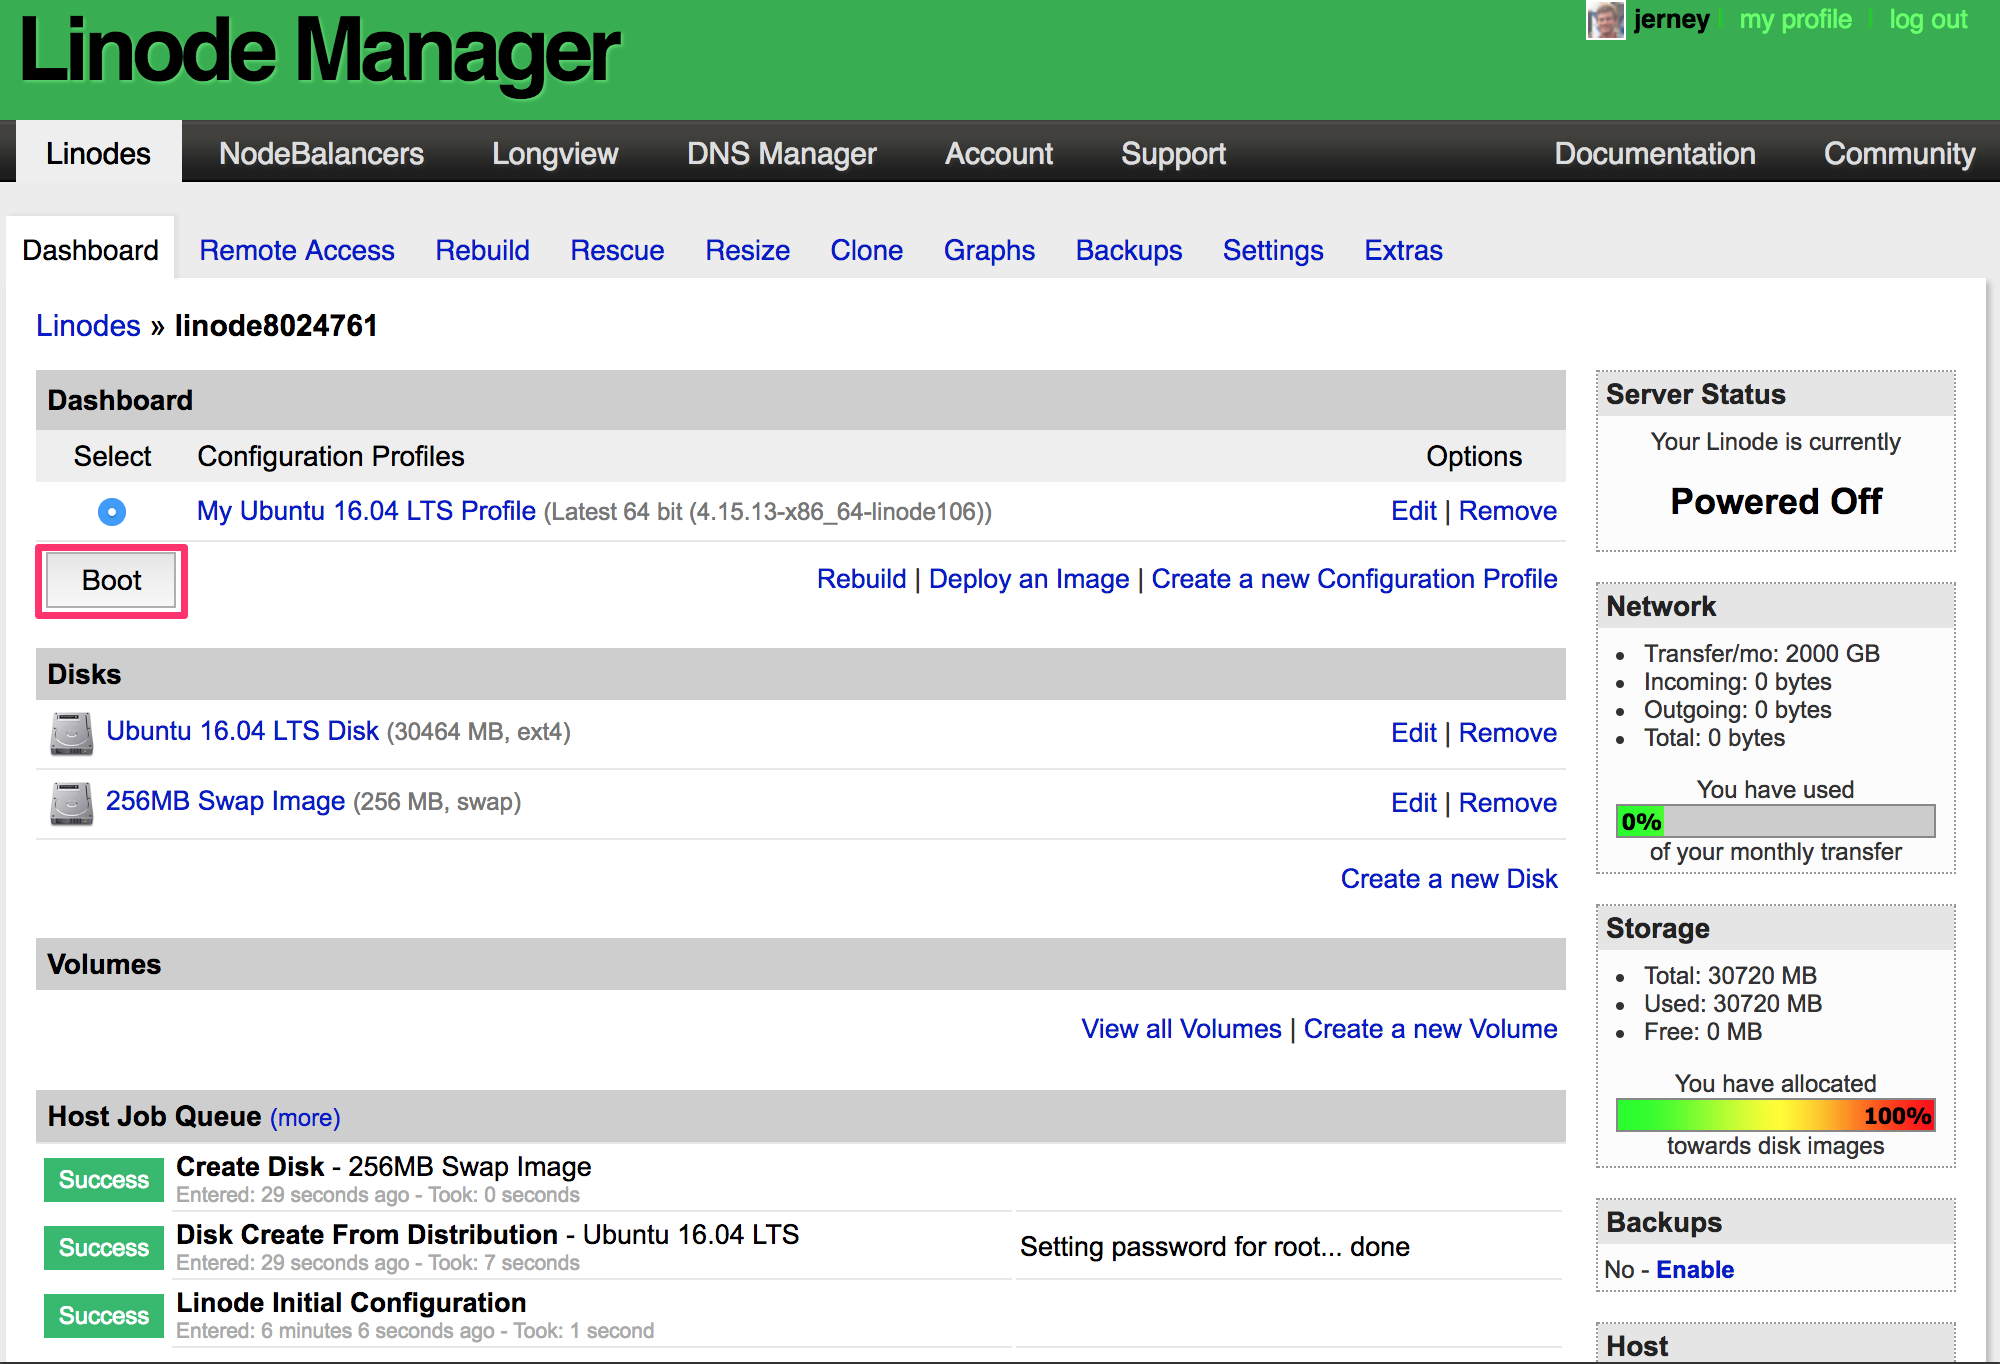
An alert will pop up, asking "Boot this Linode?". Click the "Ok" button and you'll see a "System Boot" task in the "Host Jobs Queue". Wait for this job to finish and click the "Remote Access" tab.
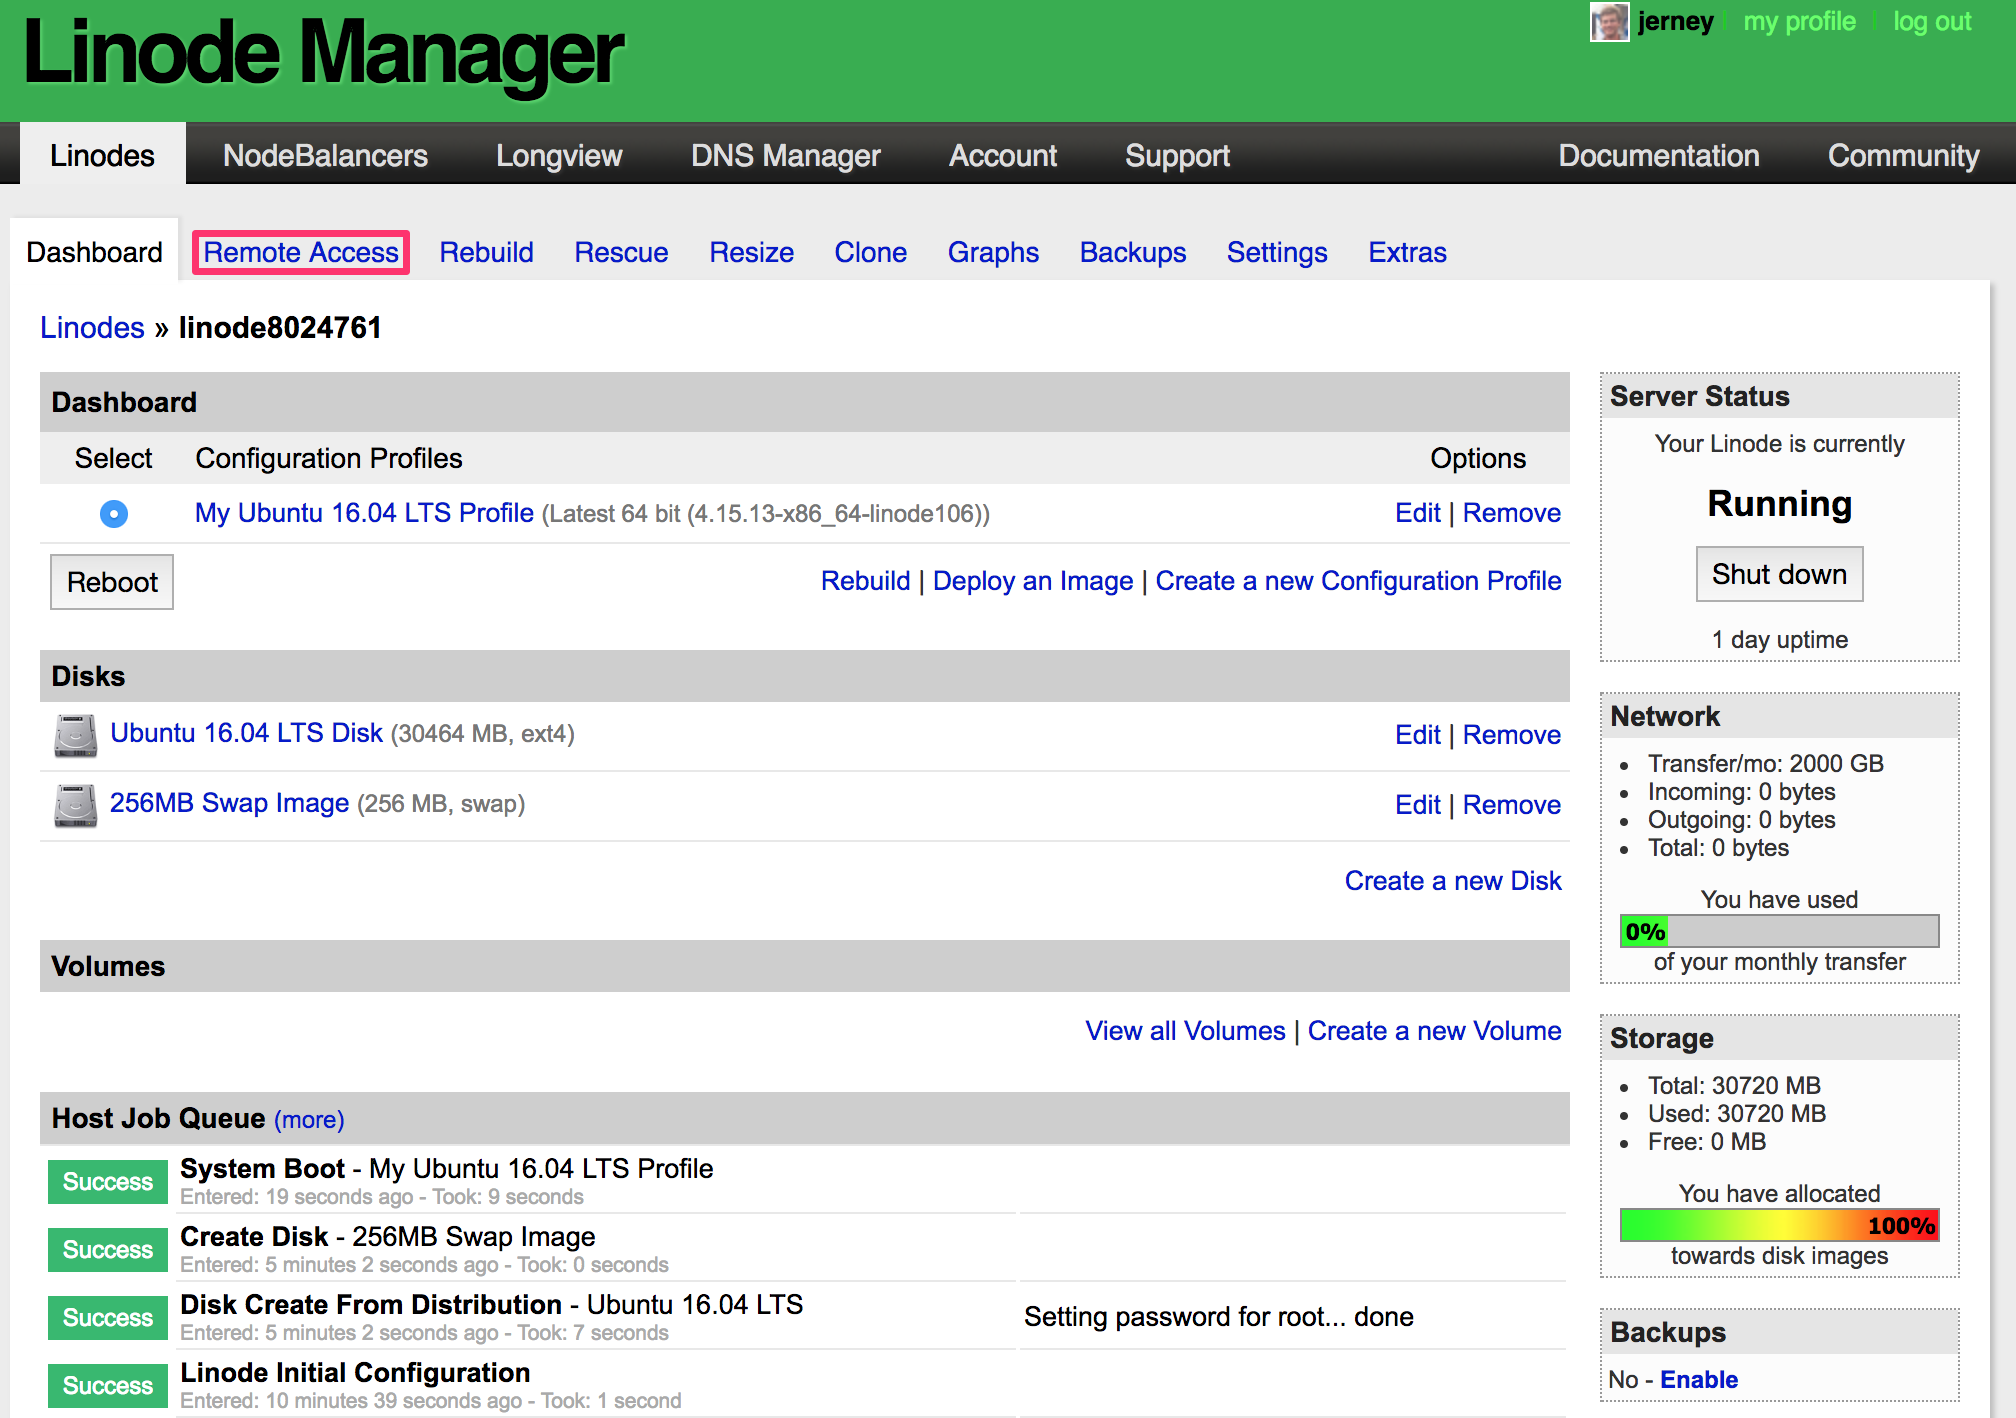
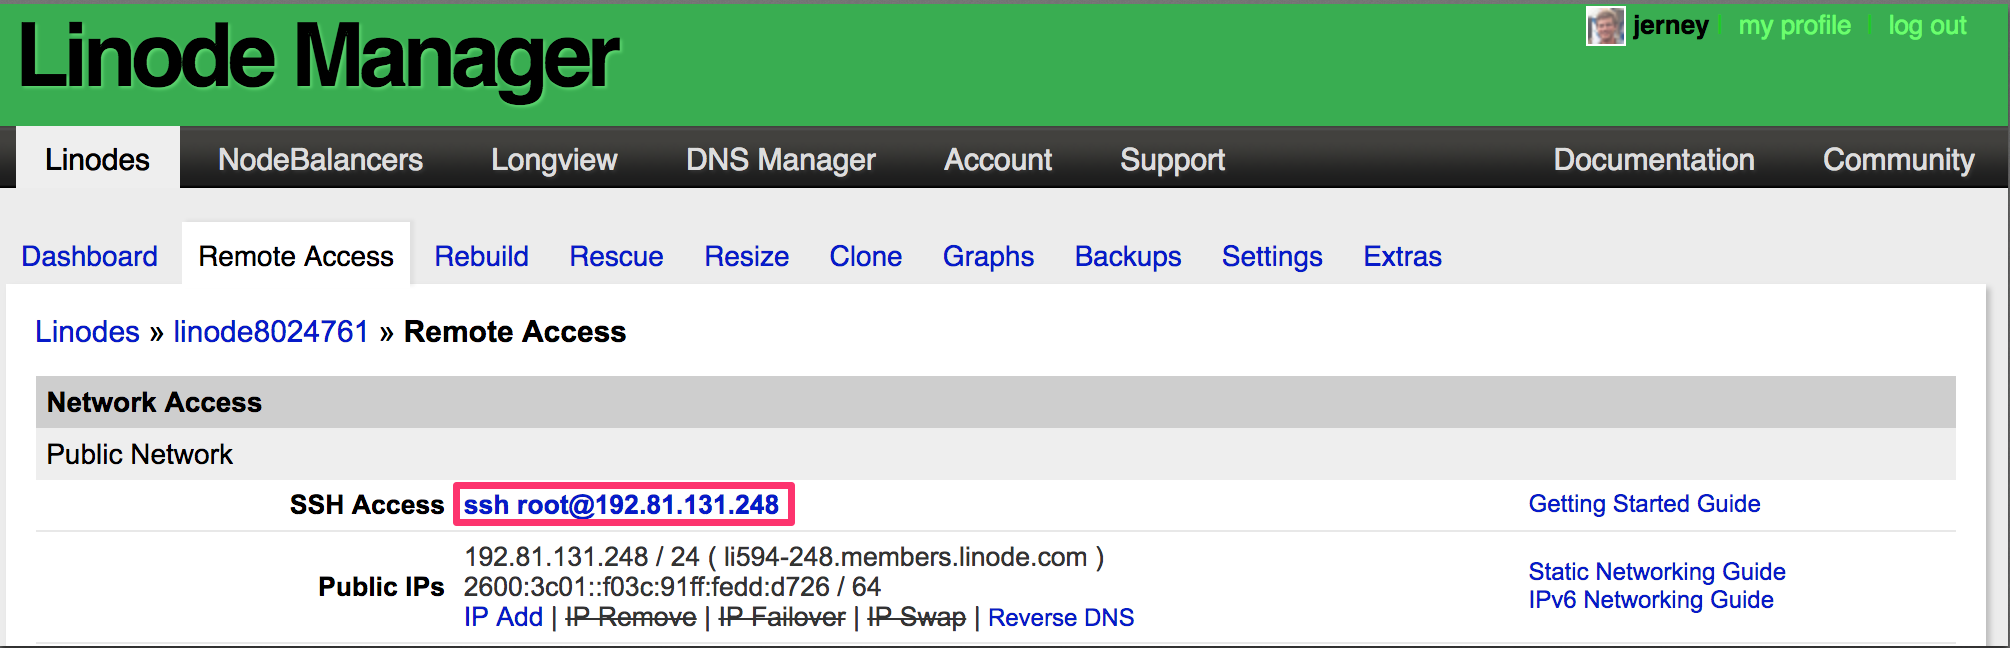
Here, you should be able to click on the link next to the "SSH Access" and it will open your command prompt and execute the command to gain you SSH access to your Ubuntu instance. If not, just copy paste the ssh root@... command, copy it into your command prompt, and execute the command.
After remotely connecting to your instance, you're ready to install Ghost.
Installing Ghost
First, we will need to establish all the prerequisites for install Ghost-CLI, Ghost's command line interface tool. Using the command line, setup a new user and log in as the created user (note: everything after # is a comment and should not be included in the command):
root:~# adduser ghost-user          # add new user
root:~# usermod -aG sudo ghost-user # give new user elevated permissions
root:~# su - ghost-user             # login as new user
ghost-user:~$
Next, update the package list and upgrade the install packages:
ghost-user:~$ sudo apt-get update && sudo apt-get upgrade
Install NGINX:
ghost-user:~$ sudo apt-get install nginx
Make sure the firewall allows HTTP(S) connections:
ghost-user:~$ sudo ufw allow 'Nginx Full'
Install MySQL, making sure to set a password for the root user:
ghost-user:~$ sudo apt-get install mysql-server
Next, we will add the NodeSource APT repository for Node 6 so that we can install Node.Js, then we will install Node.js:
ghost-user:~$ curl -sL https://deb.nodesource.com/setup_6.x | sudo -E bash
ghost-user:~$ sudo apt-get install -y nodejs
Let's install the Ghost-CLI:
ghost-user:~$ sudo npm i -g ghost-cli
And then verify it installed correctly:
ghost-user:~$ ghost help
Now create a new folder for Ghost to reside, give your ghost-user ownership of this direction, give the folder the correct permissions, and navigate to the folder:
ghost-user:~$ sudo mkdir -p /var/www/ghost
ghost-user:~$ sudo chown ghost-user:ghost-user /var/www/ghost
ghost-user:~$ sudo chmod 775 /var/www/ghost
ghost-user:~$ cd /var/www/ghost
And now, the moment you're been waiting for. Install Ghost:
ghost-user:/var/www/ghost$ ghost install
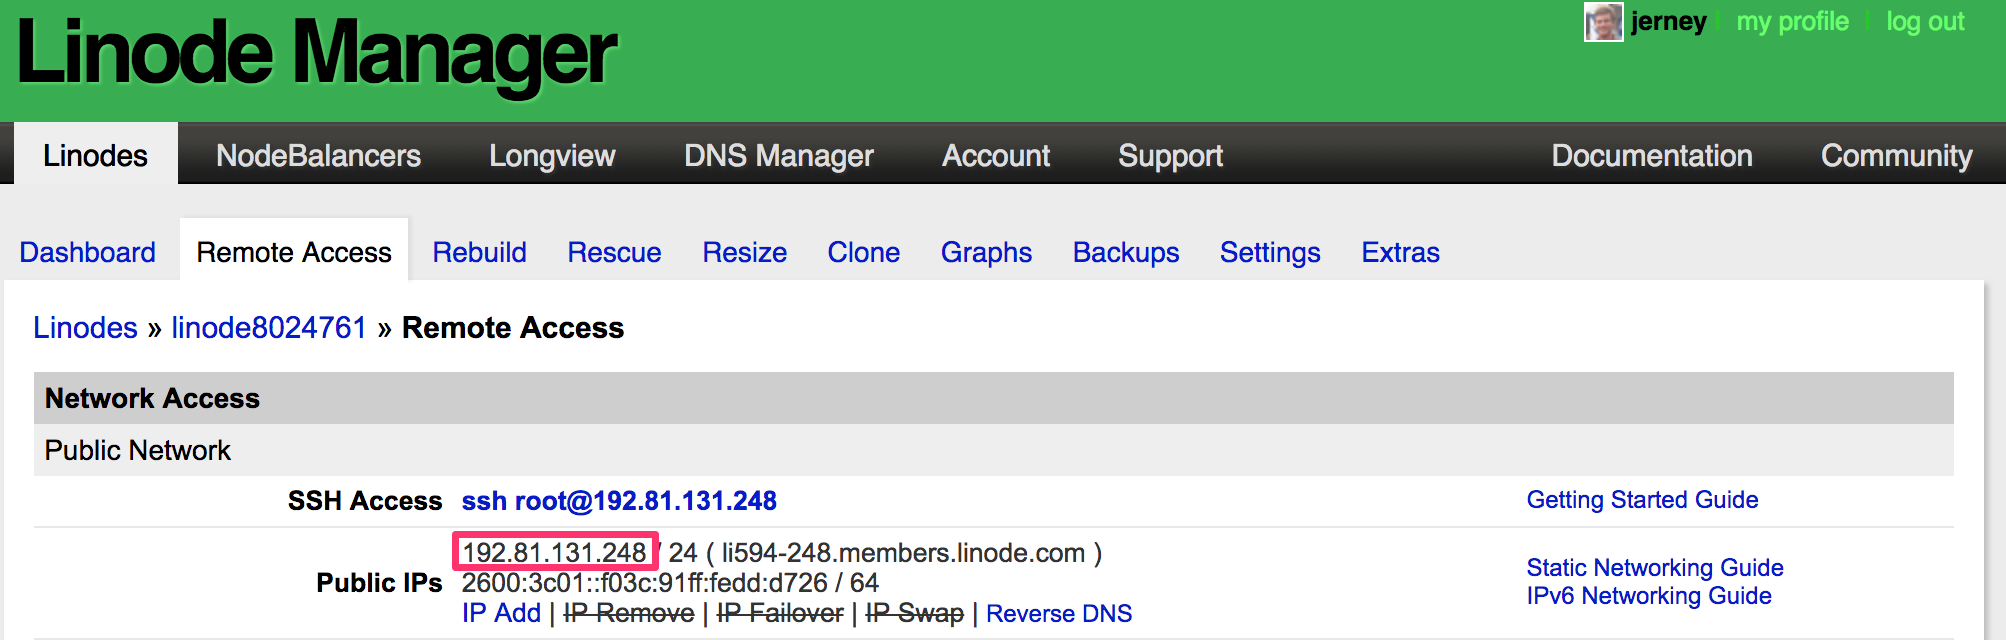
You'll be asked a few questions during the setup, the first being what you'd like your blog URL to be. Go back to your web browser and navigate to the "Remote Access" tab of the Lindoe you're working with. Next to the "Public IPs" lable, highlight the IPv4 address (but make sure not to copy the /24)
Return to the SSH session in your command line. The entry for your prompts should look like this:
? Enter your blog URL: http://<paste-your-droplet-public-ip-here>
? Enter your MySQL hostname: localhost
? Enter your MySQL username: root
? Enter your MySQL password: [hidden]
? Enter your Ghost database name: ghost_prod
? Do you wish to set up "ghost" mysql user? Yes
? Do you wish to set up Nginx? Yes
? Do you wish to set up SSL? No
? Do you wish to set up Systemd? Yes
? Do you want to start Ghost? Yes
Now that Ghost is running, go ahead and paste the URL you copied earlier into your favorite web browser and admire your handy work!